
www.TestsTestsTests.com

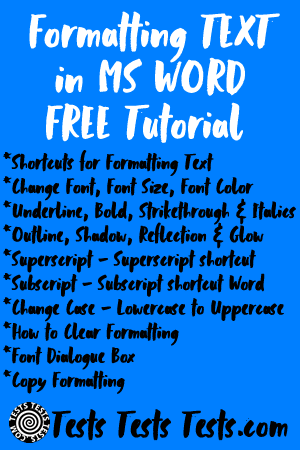
Formatting Text in Word Tutorial 2016
Microsoft Word 2016 Tutorial
Free Online Microsoft Word Tutorial
|
 |
Formatting Text in Word – quick VIDEO intro
How to change the way the text looks using a different font, font color, bold, italics, underline, strike through and spacing. Learn how to make your font superscript or subscript and change the case. Copy the formatting by using the Format Painter.
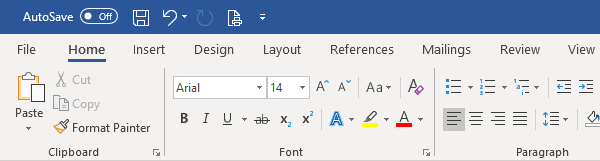
The Word Ribbon for Fonts
- Word Shortcuts for Formatting Text
|
Text Effect |
Word Shortcut |
Text Effect |
Word Shortcut |
|
Bold |
Ctrl+b |
Font Settings |
Ctrl+Shift+p |
|
Underline |
Ctrl+u |
Increase Size |
Ctrl+> |
|
Italics |
Ctrl+i |
Decrease Size |
Ctrl+< |
|
Superscript |
Ctrl+Shift+= |
Subscript |
Ctrl+= |
|
Copy Formatting |
Ctrl+Shift+c |
Paste Formatting |
Ctrl+Shift+v |
- Change Font in Word
One of the simplest ways to change the appearance of your document is to select a custom font. Technically the term font refers to the typeface, style and size collectively, however in common parlance, the terms font and typeface are used interchangeably. Word itself comes with several fonts, suitable for all types of documents, and many more are available from the internet.

Choosing a font is done from the Home tab of the Ribbon. Select the downfacing triangle symbol to the right of the current font name and choose from the list of installed fonts. Anything you type from now on will appear in the new font you’ve selected.
Often, we need to change the font after we have already typed out the document. Breathe a sigh of relief, there’s no need to retype everything each time. Simply select the extant text you wish to change and select the desired font. Everything selected will be changed.
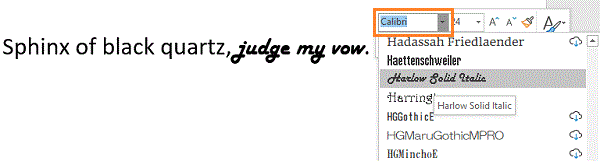
Alternatively, with the text selected, right click and select the font from the context menu which appears.
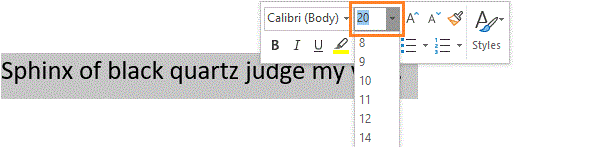
- Change Font Size in Word
As alluded to above, you can also adjust the size of your font. This is done in the selection box to the right of the font name (where we changed our font earlier).
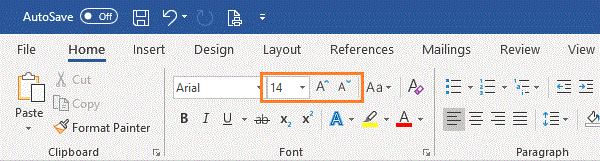
You can either click the downward triangle to select from a list of sizes, or simply click where the current size is displayed and type the number in manually. Additionally, immediately to the right this selection box, you will find two buttons; the leftmost is a large A with a downward pointing arrow (keyboard shortcut Ctrl+>) and to the right of it a smaller A with a downward pointing arrow (keyboard shortcut Ctrl+<). Clicking these buttons will increase and decrease the font size respectively.
As with the font itself, font size can also be changed for existing text if you select it. It is also possible to make this change from the context menu accessed by right clicking selected text.
- Change Font Color in Word
A dash of color in the right places can go a long way towards making your document visually appealing and pleasant to read.

In order to set the color for your text, click on the button that shows an A above a line of color.
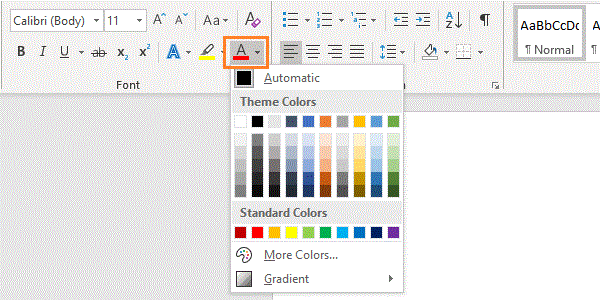
Left click on the desired color to set your text color. Existing text can be changed by first selecting it with the mouse.
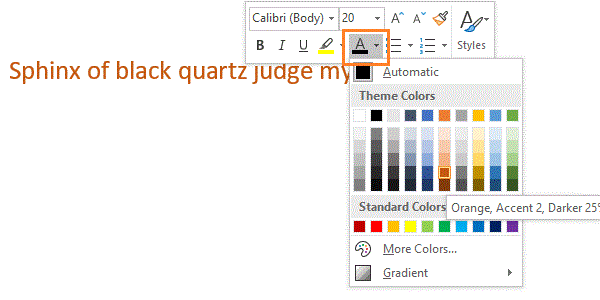
As with previous sections, color can be set in the context menu accessed by right-clicking your selected text.
- Change Font Style – Underline, Bold, Strikethrough & Italics in Word
Many times, we need to give particular words or paragraphs special emphasis, we do this with font styles.

To set the style, you have four button options.
- Bold, represented by a B (keyboard shortcut Ctrl+B)
- Italics, represented by an I (keyboard shortcut Ctrl+I)
- Underlined, represented by a U (keyboard shortcut Ctrl+U)
Strikethrough, represented by ab (no keyboard shortcut)
You have the option to apply multiple styles simultaneously, such as underlined bold text, or any combination of the four styles.
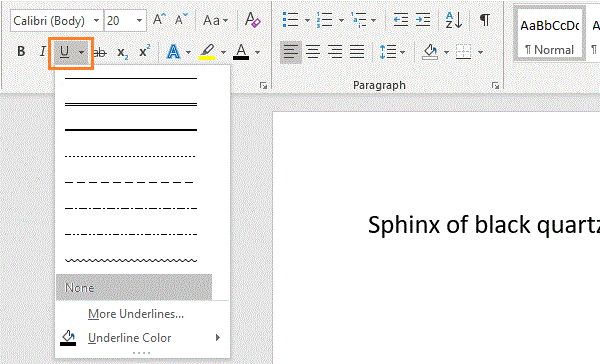
In addition to the default single line for underlined text, clicking the downward pointing triangle to the right of the underline button will allow you to select from multiple underline styles and colors.

As with all previous font customization functions, these styles can be applied to existing text by highlighting it first. Right clicking will allow setting text as bold, italicized or underlined from the context menu. The context menu does not provide a way to set text to strikethrough or to change the underline style.
- Font Effects in Word – Outline, Shadow, Reflection & Glow in Word
Depending on the purpose of your document, you may need even more striking visual effects. These features are available by clicking the Text Effects and Typography button in the Font section of the Home ribbon.

Clicking this button will give you access to a bevy of effects including outlined text, shadows, reflection and glow.
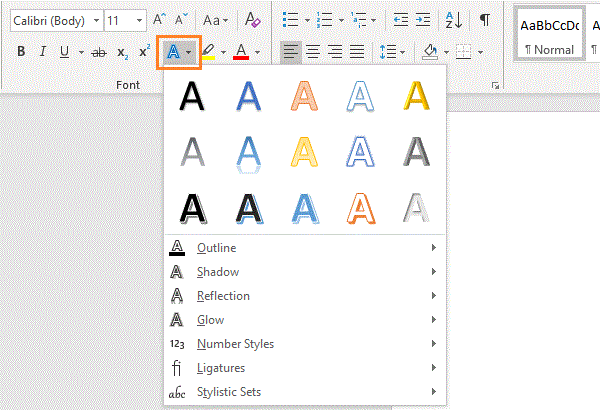
Although this button is not present on the context menu, it is still possible to set effects for existing text by first highlighting the text you wish to apply the effects to.
- Superscript in Word – Superscript shortcut Word
Superscript is defined as “a distinguishing symbol (such as a numeral or letter) written immediately above or above and to the right or left of another character”. Common reasons to utilize superscript include referencing notes in the footer and representing exponents in mathematics.
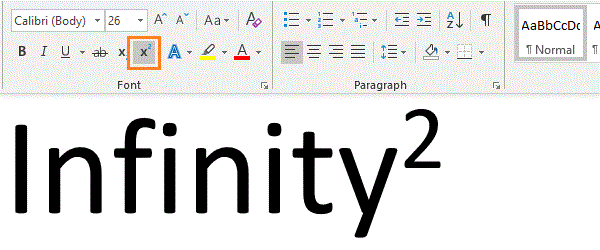
The button for superscript is represented as an x followed by a superscript 2.
- Subscript in Word – Subscript shortcut Word
Subscript is similar to superscript, except the text follows immediately below and to the side of another character. Common uses for subscript include chemical formulas and function notation in mathematics.
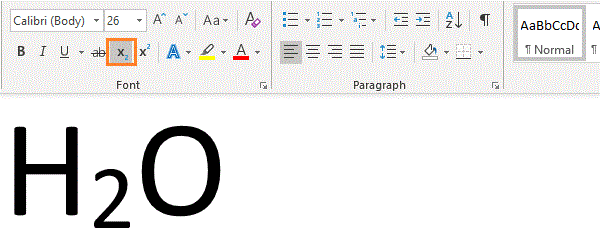
The button for subscript is represented by an x, followed by a subscript 2. The keyboard shortcut for subscript is Ctrl+=.
Subscript Shortcut Word:
Ctrl+=
- Change Case in Word – Change Lowercase to Uppercase in Word
There are three certainties in life: death, taxes and accidentally leaving Caps Lock on.
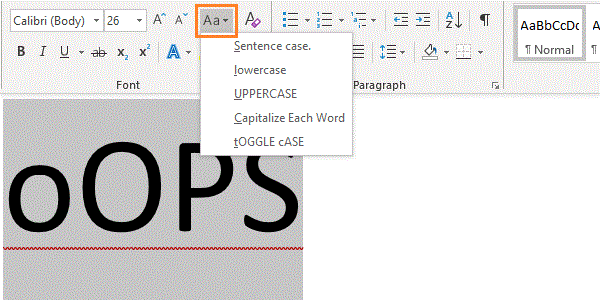
If, for whatever reason, you’ve used the wrong case for a particular body of text, there’s no need to erase and retype everything correctly. Simply highlight the offending characters, click the Aa button, and choose an option that best represents what you’d originally intended.
- How to Clear Formatting in Word
If you need to revert text back to default, but don’t want to undo each applied effect or style, there’s a button for that. Represented by an uppercase A and a picture of an eraser.

First, highlight the text you wish to revert and click the Clear All Formatting button.
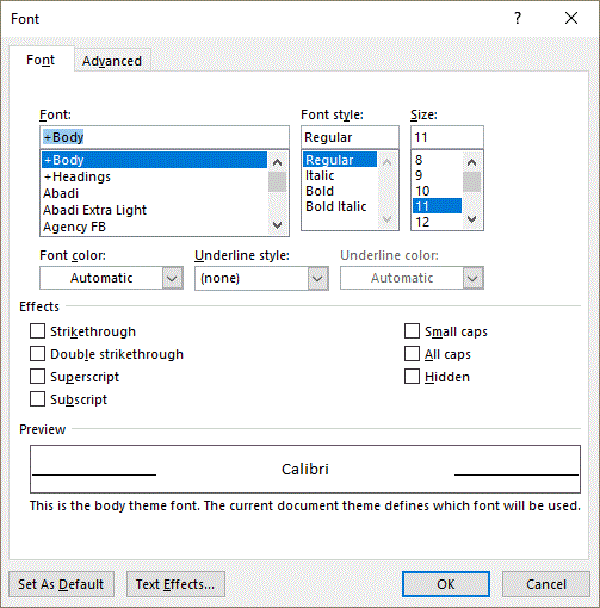
- Font Dialogue Box – Everything in One Place
Aside from the ribbon, one can access all these functions from the font dialogue box, accessed via the context menu. Simply right click the page, or highlighted text, and select Font from the menu. You can also open this dialogue by holding Ctrl+Shift+p.
- Word Copy Formatting
This final function is not part of the Font section of the ribbon, but rather from the Clipboard section.

Left clicking the Format Painter button, represented by a paintbrush, will duplicate all format settings at the text cursor’s current position. Any text you highlight immediately after this will have those same formatting settings applied.
It is also possible to copy formatting using keyboard shortcuts. Firstly, highlight the text that is already formatted correctly and hold Ctrl+Shift+c, then highlight the text you wish to format and hold Ctrl+Shift+v.
Woohoo! Now that you have done the tutorial:
* TRY THE NEXT TUTORIAL: Formatting Paragraphs in Word 2016 Tutorial
* TRY THE NEXT TEST: Formatting Paragraphs in Word 2016 Test