www.TestsTestsTests.com
Creating & Applying Styles
in MS Word Tutorial
MS Word 2010 Training – Formatting
Free Online Microsoft Word Tutorial
* Apply a Style
* Edit an Existing Style
* Create a New Style
* Apply Style Sets
* Clear Styles
Formatting a document to look consistent and professional requires some planning. Styles can be built-in, modified or created from scratch. Create and use your own styles to ensure all documents you send out are branded the same.t some of your document or all of it.
* Apply a Style
Using styles is a quick way of formatting a document to look professional and neat. It is also a way of automatically marking headings that need to be added to a table of contents at a later stage.
Word comes with a default built-in style set.
To view and apply styles:
1. Select the text you wish to apply the style to.
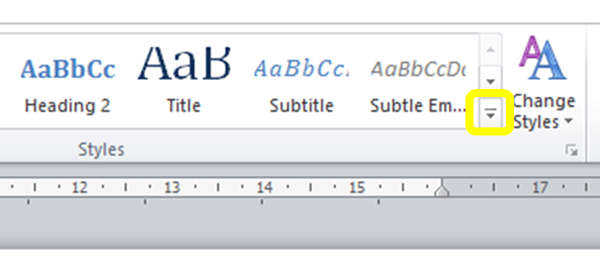
2. Click on the Home tab on the Ribbon and in the Styles group, click on the Styles Gallery button (circled in yellow in the screenshot below):
This will expand the Styles Gallery:
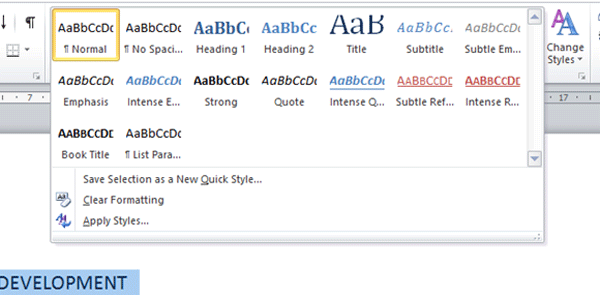
3. Click on the Style you wish to apply to the text you selected, for example, Heading 1 is the name of a style you can apply from this gallery.
4. The style will immediately be applied to the text. Continue selecting text and applying styles to the rest of your document. For consistency, you may wish to use the same Style for all headings, paragraphs, etc.
Here are two screenshots of the same text before and after styles were applied:
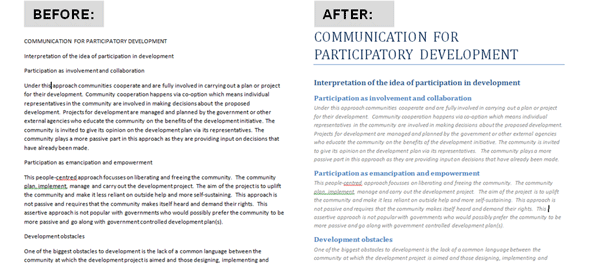
Using styles, the document on the left was formatted in less than five minutes. Using styles in a document not only makes the document look professional, it is also quicker and easier than using manual formatting.
* Edit an Existing Style
Making changes to an existing style is quick and easy. Although there is a lot of complex style editing that can be done, this tutorial will examine the simplest method to quickly edit a style.To edit a style that has been applied in a document:
1. Select any word or text to which the style has been applied.
2. Make manual format changes to the text. For example, change the text alignment, font color, size, line or paragraph spacing:
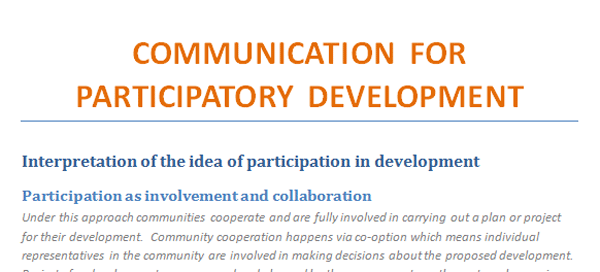
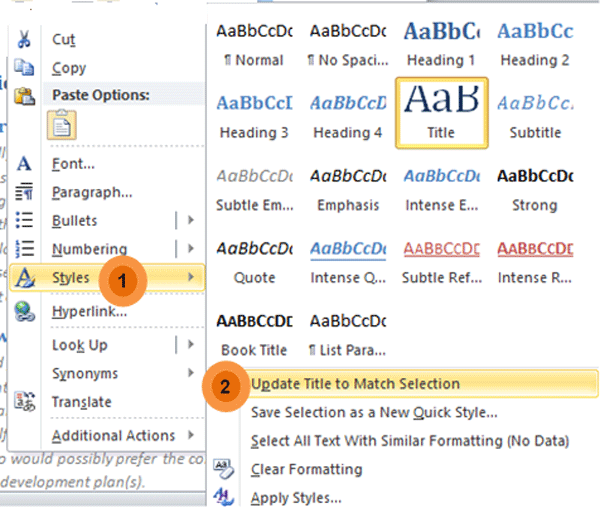
3. With the text selected, right-click and then click on Styles (numbered 1 in the screenshot below) in the menu. Next click on Update [style name] to Match Selection (numbered 2 in the screenshot below). The name of the style we are updating is called Title, but the style name will depend on the style you are editing.
All the manual edits you made to the applied style will automatically be updated to the Style. In addition, everywhere that style has been used in the document will automatically update to reflect the changes.
* Creating a New Style
If you find yourself repeating the same manual formatting to text, for example, adding bold, changing the color or line spacing, you may be better off saving the formatting as a Style.
To create a new style:
1. Type and/or select a line of text.
2. Apply manual formatting to it. For example:
* Make it bold* Change the font to Cambria (or any other font if this one is not installed on your PC)
* Change the font size to 28 pts
* Change the font color to Purple Accent 4 (or another color if you like)
* Apply 0 pts before and 10 pts after paragraph spacing
* Centre align the text* Apply a shading to the text, for example, Blue Accent 1, 80%
Your text may look something like this:

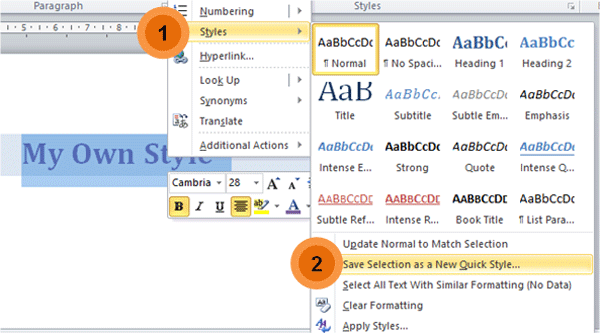
3. Next, select the text you applied manual formatting to and right-click. Select Styles (numbered 1 in the screenshot below) from the menu and then Save Selection as a New Quick Style (numbered 2 in the screenshot below):
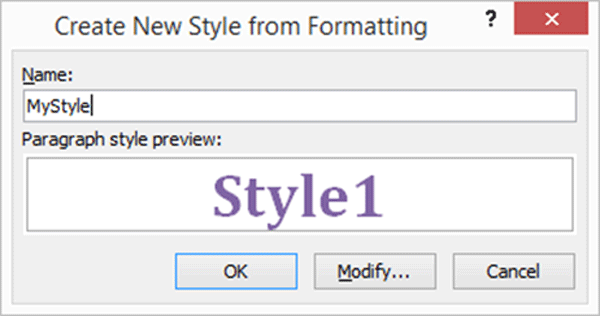
4. In the Create New Style from Formatting box, type a unique name for your style, for example, MyStyle and press OK:
If you launch the Styles Gallery under the Home tab, you will note the style you created is now available in this gallery and you can apply it to any text you select in your document.
* Apply Style Sets
Style sets are collections of pre-designed styles that can quickly be applied and changed.
To apply a Style Set:
1. Open the document you wish to apply the Style Set to. No need to select the text, just position your cursor anywhere within the document.
2. Under the Home tab on the Ribbon in the Styles group, click on the Change Styles button. From here, select the Style Set option.
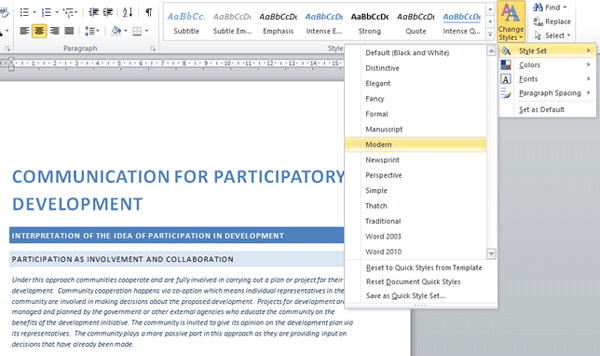
3. Hovering your mouse cursor over any of the Style Sets will display a live preview in your document of what the Style set will look like when applied. To apply a Style Set, click on it.
* Clear Styles
To remove styles from a word, sentence or even the whole document, you need to clear styles and restore it to the default style for all Microsoft Word documents, which is aptly titled NormalTo clear styles:
1. Select the word, sentence, paragraph or whole document to remove style(s) from.
2. Click on the Clear Formatting button (circled in yellow in the screenshot below) which is located under the Home tab in the Font group.

This will remove the applied styles from the selected text and return the text to the Normal style.
Quick Tip:
You can use the shortcut key combination Ctrl+Shift+N to clear applied styles.
Test your MS Word skills with the corresponding FREE Online Multiple Choice
Creating & Applying Styles in MS Word 2016 Test
TRY THE NEXT TUTORIAL: Printing Basics in MS Word Tutorial
TRY THE NEXT TEST: Printing Basics in MS Word Test


