
www.TestsTestsTests.com

The Views in Word Tutorial
Free Online Microsoft Word Tutorials
MS Word 2010 – Getting Started
* Print Layout View
*
Full Screen Reading View
*
Draft View
*
Outline View
*
Zoom Settings
There are different ways to view your document depending on what you want to do. Understanding and using the different views in Word can make your work much easier. This includes the Print Layout, Full Screen Reading, and Draft views and using the Zoom feature.
Test your MS Word skills with the corresponding FREE Online Multiple Choice
The Views in Word Test
* Print Layout View
Print Layout View is the default view a document opens up in, in MS Word. It shows you your page margins and layout of the document as it actually will look like when printed. Many people also find this the easiest of the view types to work in.
1. Your document will open in the Print Layout View by default. To verify that you are in the Print Layout View, click on the View Tab on the Ribbon.
2. This will open up a section of the Ribbon that contains a multitude of functions to change how a document is displayed in the Word screen.
3. In the Document Views group, on the left-hand side of the Ribbon, ensure that Print Layout is selected.
4. The Print Layout button (circled in yellow in the screenshot below) will be highlighted if it is selected. If it is not highlighted, click on it once to change to Print Layout View.
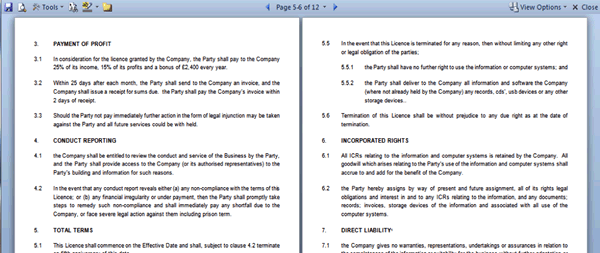
Depending on your screen size, a document in Print Layout View will look like this:

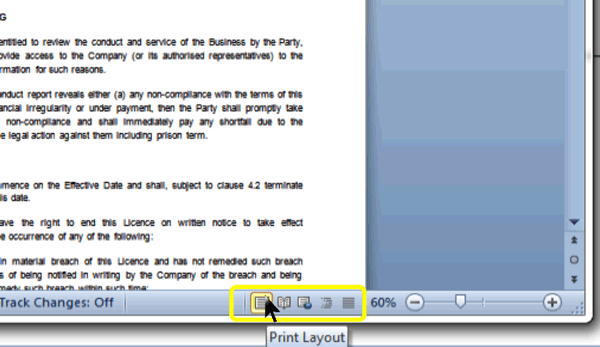
You can also change to Print Layout View or see if it is selected by observing the View Shortcuts area (circled in yellow in the screenshot below) on the Status Bar at the bottom right-hand corner of the Word Screen. Hovering over the View Shortcut icons will provide you with a quick tip as to which view the icon represents:
The Print Layout View is the best view type for doing any work relating to document layout, working with graphical elements, document design and formatting. It shows you what the document will look like when printed.
QUICK TIP: To quickly activate the Print Layout View, hold down the Alt and Control keys on your keyboard and press P (Alt + Control + P).
* Full Screen Reading View
Full screen reading is a little like the great grandmother of Amazon’s Kindle or Apple’s iPad. Its main purpose is to act as a ‘reader’ allowing you to read lengthy documents without the usual clutter of Word options and Ribbons. You can open, read and review a document using review functions such as highlighting, track changes, comments and even modify text in this view. It also allows you to change the font size and reading layout of a document.
1. To change the view of a document to Reading View, click on the View Tab on the Ribbon. In the Document Views group click the Full Screen Reading button to change the view to Reading View.
Depending on your screen size, Full Screen Reading View looks like this:
2. You use the navigation arrows located at the top-middle of the screen to go to the next page or previous page in the document. If you click in the center of the two navigation arrows, you will find more options for quickly moving around in your document. You can use these functions to navigate to the beginning and end of the document or go to a previous section or the next section. Use the Go To and Find functions to find specific content or to navigate through headings contained in your document:

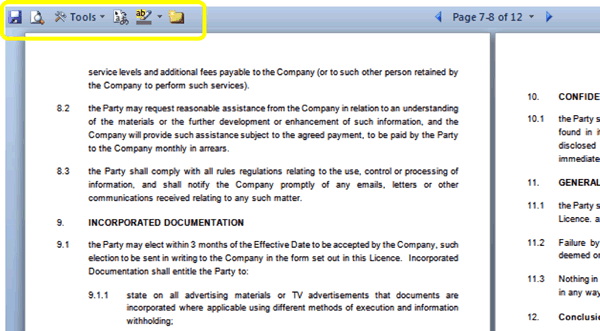
3. Use the shortcuts in the top left-hand corner to save, print preview, translate, highlight and add comments to the document:
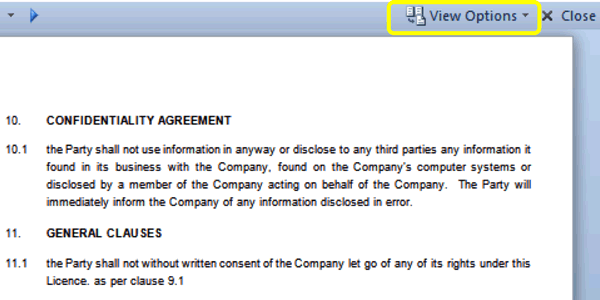
4. To change the size of text in Reading View or to change how many pages are displayed, click on the View Options button located at the top right-hand corner:
5. To enable typing in this view (by default you are not able to type in Full Screen Reading View), click on the View Options button and select ‘Allow Typing’ which is located towards the end of the list.
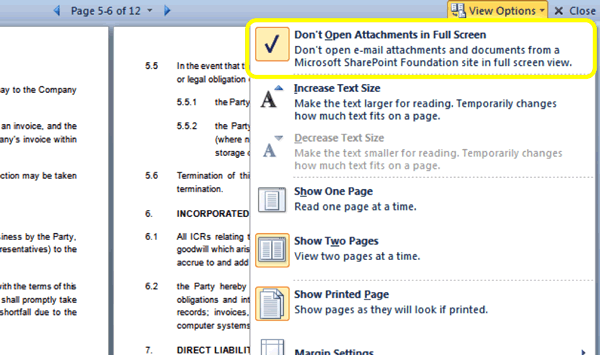
By default Microsoft Word attachments that you open from Outlook, will open in Full Screen Reading View. If you prefer for Word attachments in Outlook to open in Print Layout View, click on the View Options button and deselect: ‘Don’t Open Attachments in Full Screen’. You are able to ascertain if this function is active by observing a highlighted tick mark next to the function name:
To exit the Full Screen Reading View, press the Close button located at the very top right-hand corner of the Reading View screen.
* Draft View
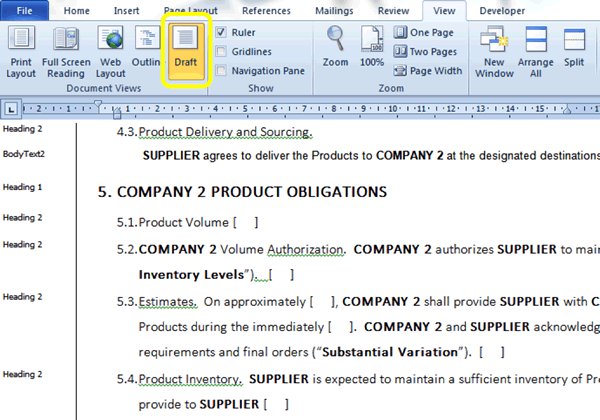
Draft View, also known as Normal View, is the perfect view type for working with styles in a document. It provides you with a very clean and simple view of your document allowing you to construct and deconstruct styles without the usual clutter.1. To enable the Draft View, press the Draft button located in the Document Views group under the View Tab on the Ribbon:
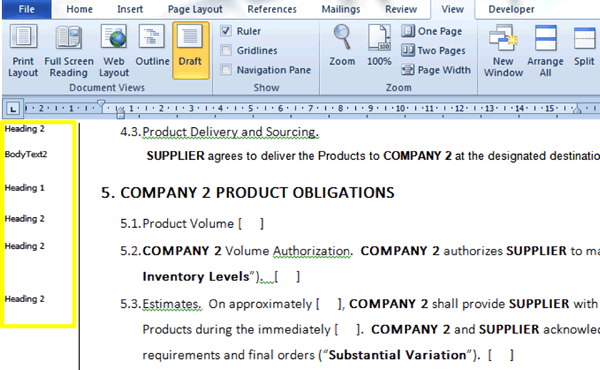
2. Styles applied in the document are found in the styles area pane on the left-hand side of the screen and run parallel to the section of text to which it is applied:
3. The Styles Area Pane is not enabled by default. If it does not appear when you open the Draft View, do the following:
• Click on the File Tab to open the Backstage View
• Click on the Options button to open Word options
• Click on Advanced and scroll down to the heading that says: “Display”.
• Next to the line that states “Style area pane width in Draft and Outline Views” enter a value for how wide you wish the pane to be. (circled in yellow in the screenshot below):
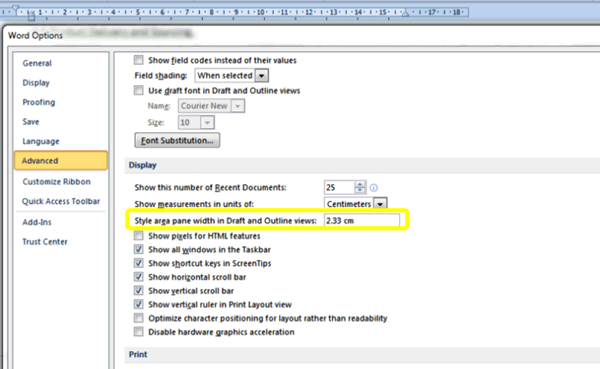
• Press OK to accept the change and to close the Word Options dialogue box.
Page breaks are indicated by a dotted line in the Draft View.
QUICK TIP: A shortcut for quickly going to the Draft View is: Control + Alt + N.
* Outline View
Outline View is a powerful tool for working with headings and levels in a document. It gives you a quick overview of the ‘skeleton’ of your document, allows you to check your formatting for consistency, promote and demote levels and move sections around with very little effort.
1. Access the Outline View by clicking on the View Tab on the Ribbon and then on the Outline View button in the Document Views group.
Depending on your screen size, the Outline View looks something like this:
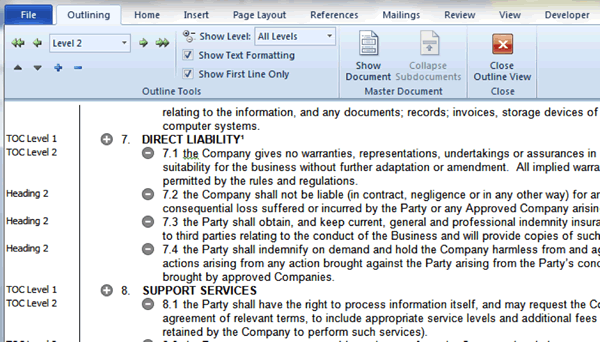
In this view you are able to ascertain which styles have been applied in your document, work with levels, display specific levels only and promote or demote levels in your document.
2. To ascertain which styles have been applied in the document and to which content, study the panel located on the left-hand side of the screen. The style name is placed next to the content it is applied to, for example, in the screenshot below, the yellow circled lines tell you that the style name is TOC Level 1 and it is applied to a first level heading.
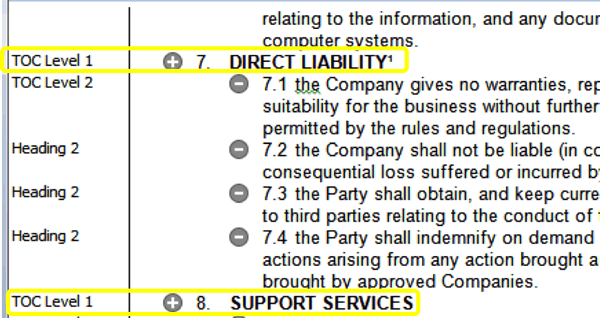
3. The circles with a plus or minus sign next to the text allow you to expand or collapse a level. You may wish to view an outline of your document displaying only the headings and not the lists (or levels) below them. Clicking on the ‘plus’ symbol will expand the section, clicking on the minus symbol will collapse the section so that only the heading level is present. In the screenshot above the levels are all expanded. In the screenshot below, the heading levels have all been collapsed:
This will allow you to quickly review a lengthy document by giving you an overview of all the headings in your document.
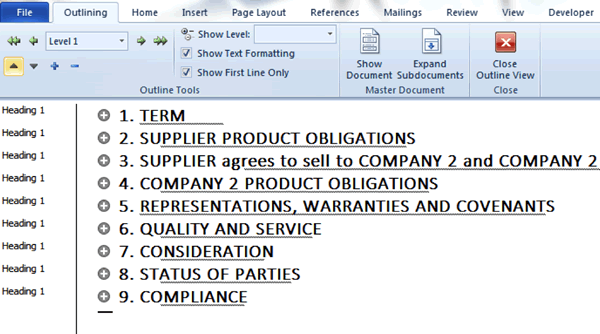
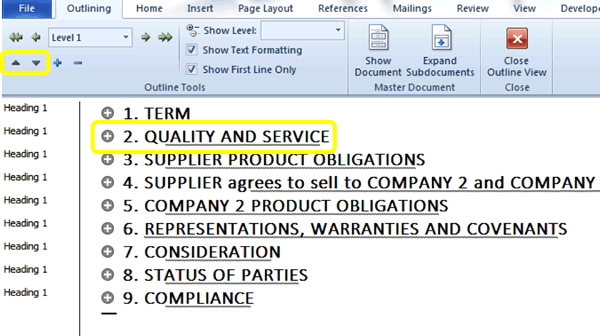
4. You can also move levels around in the document in this view without using cut and paste. Moving the first level (Heading 1 in the example above) will move the heading together will all sublevels attached to it. For example, if we move “6. Quality and Service” to a new position under “1. Term”, this will automatically move 6.1, 6.2 and 6.3 to the new position.
5. To move levels around, select the level you wish to relocate and use the move buttons (circled in yellow in the screenshot below) to move the selected section upwards or downwards to a new position:
6. You also have the power to promote or demote levels in your outline. As in any super-hierarchical organisation, documents contain levels. For example, levels in a document may look something like this:
1. Level 1
1.1 Level 2
1.1.1 Level 3
(i) Level 4
Promoting a level means bringing it closer to or making it a Level 1. Demoting a level means moving it down a level (or multiple levels). So say for example you inserted a list of paragraphs at level 3, but later decide they should actually be at level 4, you can quickly fix this in the Outline view.
7. The text selected (and circled in yellow) in the screenshot below is at level 3:
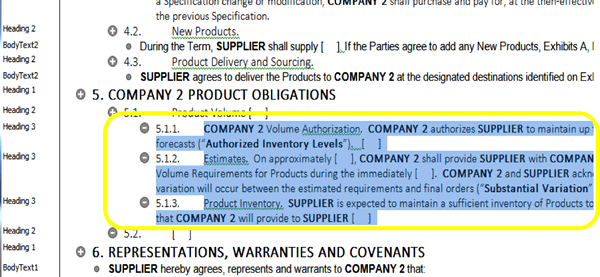
8. To promote the above to level 2 (which in this example will mean renumbering the list 5.2, 5.3 and 5.4), we use the demote and promote buttons located at the top left-hand corner of the Outline Tools group on the Ribbon. Click the arrow pointing to the right to promote and the arrow to the left to demote (circled in yellow in the screenshot below):
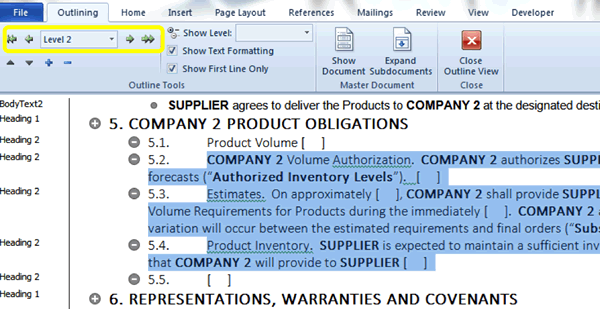
9. The box located in the center of the promoting and demoting buttons, displays the level of the selected text.
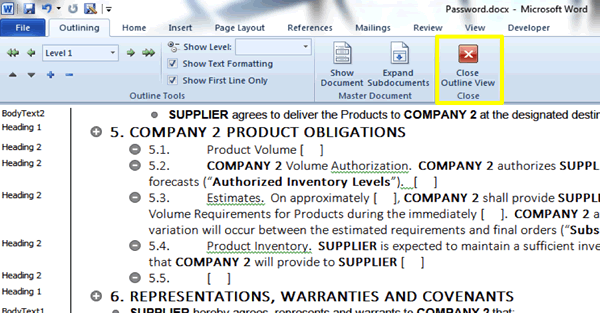
To exit Outline View, click on the ‘Close Outline View’ button located on the right-hand side of the Ribbon under the Outlining Tab:
* Zoom Settings
Zoom settings in Word allow you to get an overview or a closer look at specific elements in your document.1. Zoom options are found in the Zoom Group located under the View Tab on the Ribbon:
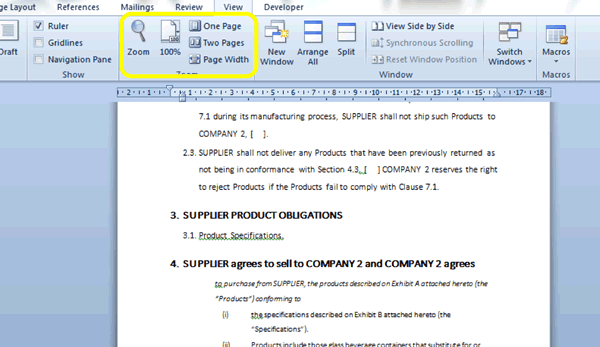
2. You can set a document zoom to 100% by clicking on the 100% button or zoom a document to display one page at a time or two pages at a time by clicking on the One Page or Two Pages buttons.
3. Clicking on the Zoom button will open the Zoom Options dialogue box:
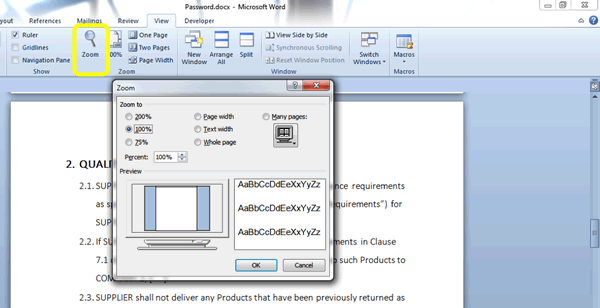
4. The Zoom Options dialogue box offers many pre-set Zoom options not available on the Ribbon and also a Percent box where you can specify an exact percentage for how much you want to zoom in (or out) of a document.
QUICK TIP: By far the easiest way to zoom in or out of a document is to use the Control key on your keyboard in conjunction with the scrolling wheel on your mouse. Hold down Control whilst scrolling the wheel forwards and backwards to zoom in or out.
Test your MS Word skills with the corresponding FREE Online Multiple Choice
The Views in Word Test
TRY THE NEXT TUTORIAL: Entering, Selecting, Editing & Deleting Textin MS Word
TRY THE NEXT TEST:
Entering, Selecting, Editing & Deleting Textin MS Word