
www.TestsTestsTests.com

The Views In Excel Tutorial
Free Online Microsoft Excel Tutorials
Excel 2010 – Getting Started
* Normal View
* Page Layout View
* Page Break Preview
* Zoom Options
There are different ways to view your worksheet depending on what you want to do. Understanding and using the different views in Excel can make your work much easier. This includes Normal, Page Layout, Page Break views and the Zoom feature. Test your Excel skills with the corresponding FREE Online Multiple Choice
The Views In Excel Test
* Normal View
Normal View is the standard way a worksheet is displayed in Excel. By default this is the view type that any worksheet you open will display as. Although normality in many areas of life is relative, in Excel there is no debate about what is Normal. Mostly because there is a big button with the word Normal on it…if only it was that easy in other areas of existence!1. To find the Normal view button and to confirm you are indeed in Normal View, click on the View tab on the Ribbon.
2. The Normal View button is located on the far left-hand side of the screen (circled in blue in the image below). The highlighting on this button denotes that it is currently the selected view for your worksheet:
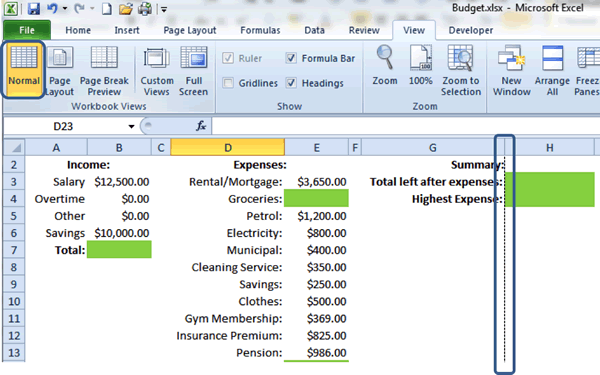
3. In the Normal View, page breaks are displayed as dashed horizontal or vertical lines (circled in the image above between columns G and H).
4. It is important to know where to find the Normal View should your display accidentally be changed by another user or a slip of the hand.
* Page Layout View
The Page Layout View displays each page in your worksheet closely representing what it will look like when printed. Pages are separated in the display by a blank space to make it easier to discern different pages. The header and footer regions of pages are displayed and you can click and type directly into them. A ruler is also displayed above the column labels and to the left of the row labels, giving you the option to manually adjust margins.This View is the closest to a word processing layout-type that Excel offers.
1. The Page Layout View button is located next to the Normal View button in the Workbook Views group under the View tab on the Ribbon (circled in blue in the image below):
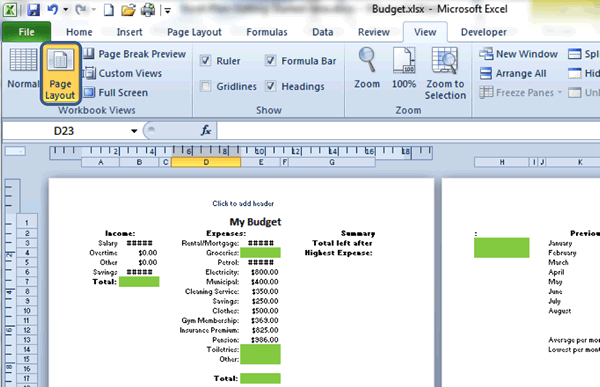
2. Use this view to get an overview of what your document is going to look like printed and add elements such as a header/footer or page number to make your worksheet look more professional and possibly give it the ‘X’ factor.
To add text to the header or footer region in this view:
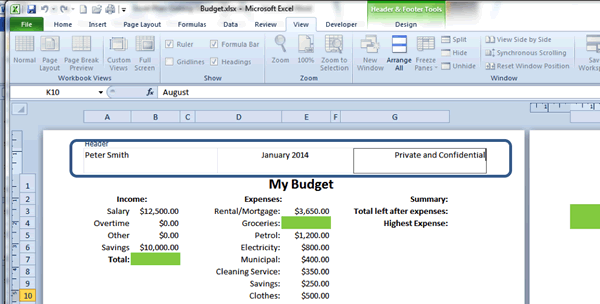
1. Click on the text at the top of the page or bottom of the page that says: “Click to add header” or “Click to add footer” and type your text.
2. Take note of the three boxes (or sections) provided for ease of formatting to keep the different sections of your header or footer separated (circled in blue in the image below):
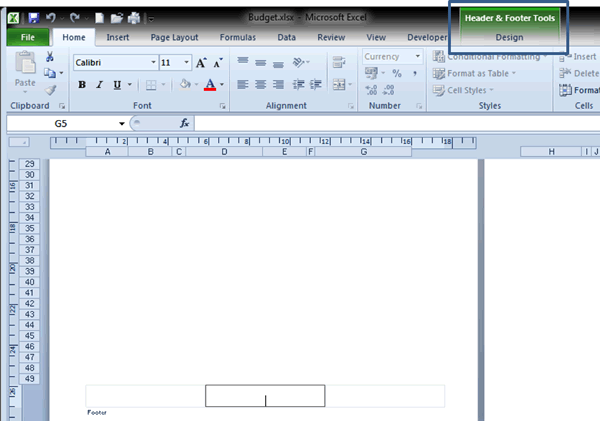
3. You can add a page number in the footer of the page by clicking in the footer region and then clicking on the Design contextual tab (circled in blue in the image below). A contextual tab is a tab that only appears on the Ribbon in the context of a selected object (the footer in our example):
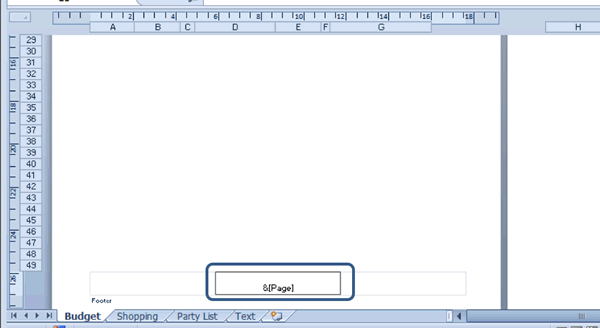
4. On the Design tab, go to the Header & Footer Elements group and click on the Page Number button. This will insert the page number function into the area of the footer your cursor is resting in and resemble the image below:
5. To view what the page number will look like when printed, go to Print Preview in the Backstage View (File – Print).
The page number will automatically be inserted and updated into all the pages your worksheet comprises.
You can also insert other useful items into the header or footer of the page, for example a counter for the number of pages, the date, time, a company logo in the form of a picture or the file name. You can also specify that the headers and footers of the first page should be different from the rest of the pages in your worksheet or that you wish to have different odd and even pages. To do this tick the relevant boxes located in the Options group under the Design contextual tab of the header or footer.
* Page Break Preview
Use this view to quickly ascertain where Excel will divide your worksheet into pages. Page breaks are displayed as blue lines (dotted and solid) and watermarks denoting page numbers. You can quickly adjust horizontal and vertical page breaks in this view without breaking into so much as a sweat!1. Click on the Page Break Preview View located in the Workbook Views group under the View tab on the Ribbon. The view of your worksheet will change and resemble the image below:
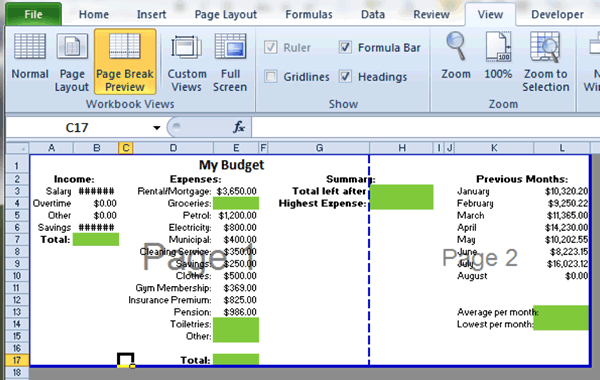
2. The solid and dashed blue lines represent where the page break is positioned. You will also note the pages have a watermark denoting Page 1 and Page 2 in this view.
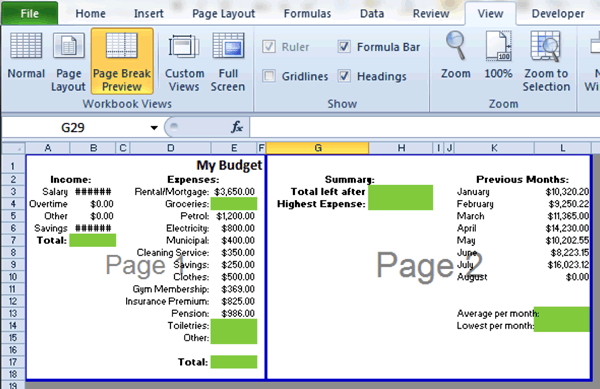
3. You can move the page break lines to change how your worksheet will be printed. For example, in the worksheet pictured above, we could move the vertical page break line so that the worksheet will be split onto a second page at a more logical point, resulting in the page division in the image below:
4. To move page breaks in the Page Break View: click on the horizontal or vertical blue line you wish to move and then hold down the mouse button to drag the break into its new position.
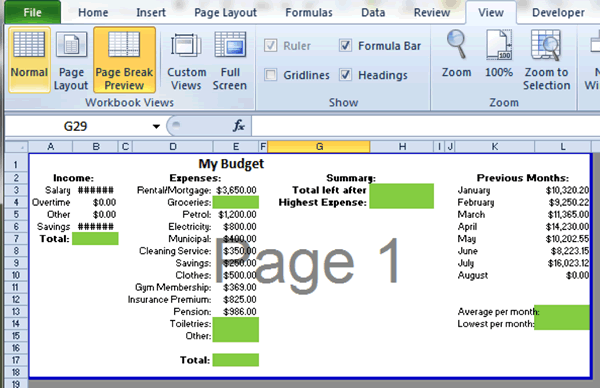
5. If we wanted the entire worksheet to print on one page, we could move the vertical line right to the end of the last column (as pictured in the image below):
What is important to remember when moving page break lines in the Page Break View is that Excel will scale the content of your worksheet in order for it to fit into the area you set and you may end up with printed worksheets that are too small to read. Always keep that in mind before moving a page break to include too many columns or rows.
* Zoom Options
Zoom options in Excel allows you to enlarge a specific section of a worksheet making it easier to read or to reduce the display size of the worksheet allowing you a more global picture of what it looks like.1. There are many ways to zoom in and out of a worksheet. You find the Zoom options (circled in blue in the image below) in the Zoom group under the View tab on the Ribbon:
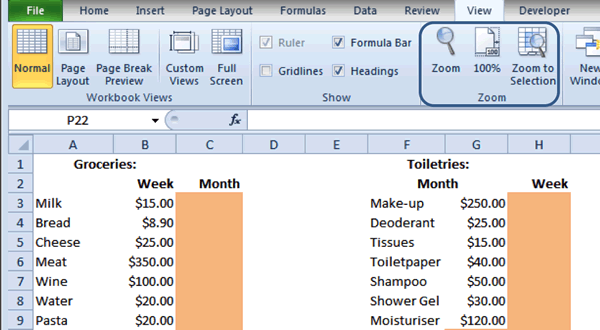
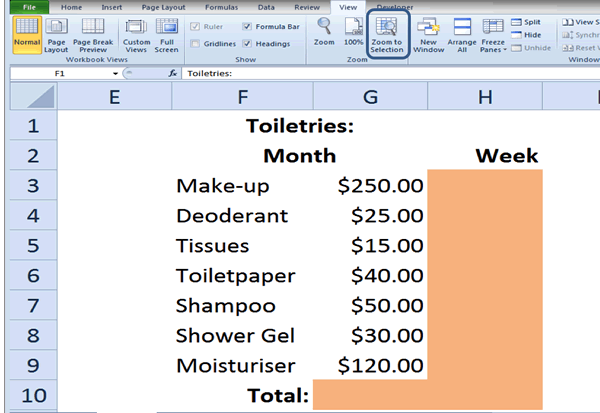
2. By far the coolest of the Zoom options, is the Zoom to Selection function (circled in blue in the image below). If you click on this button, it will zoom into the section of your worksheet where your cursor is currently located. You can also select a section of your worksheet and click Zoom to Selection to enlarge.
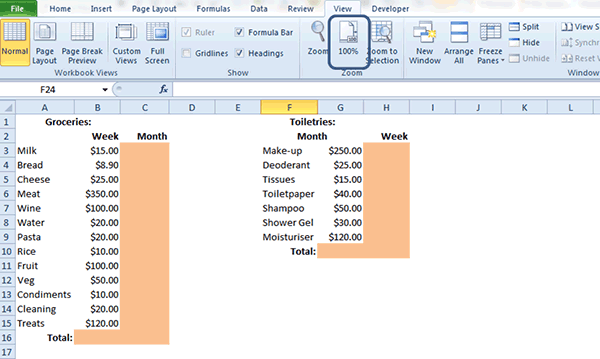
3. To change the Zoom back to the default view (100%), click on the 100% button (circled in blue in the image below) located to the left of the Zoom to Selection button:
4. You can also select a custom Zoom magnification by clicking on the Zoom button (circled in blue in the image below) located to the left of the 100% button in the Zoom group. This will launch the Zoom Magnification dialogue box:
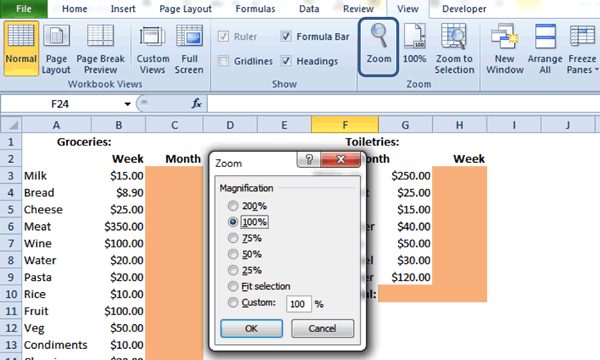
5. Select a magnification percentage or customise the percentage of magnification you require.
TIP: The easiest way to manage Zoom is to use the scrolling wheel on your mouse and the control button on your keyboard. Hold down the control button on your keyboard whilst slowly scrolling the mouse wheel backwards to zoom out and forwards to zoom in.
Woohoo! Now that you have done the tutorial:
Test your Excel skills with the corresponding FREE Online Multiple Choice
The Views In Excel Test
TRY THE NEXT TUTORIAL: Moving Around the Worksheet Excel Tutorial
TRY THE NEXT TEST:
Moving Around the Worksheet Excel Test