
www.TestsTestsTests.com

Excel Views Tutorial
Make View Types Work for You
Excel 2016 Tutorial – Learn Excel Basics
Free Online Microsoft Excel Tutorials
* Normal View Excel 2016
* Page Break Preview Excel 2016
* Page Layout View Excel 2016
* Custom Views Excel 2016
|
Excel 2016 comes packed with three built-in view types, Normal, Page Break Preview and Page Layout, as well as a set of customizable view options. |
 |
* Normal View Excel 2016
The Excel normal view, which is also the default view for all worksheets, is the easiest view to use for managing data, creating formulas and formatting rows and columns. When you open a new workbook or sheet, it will usually open with this view activated.
To set a worksheet to Normal view:
1. Click on the View tab on the Ribbon.
2. In the Workbook Views group, click on Normal.
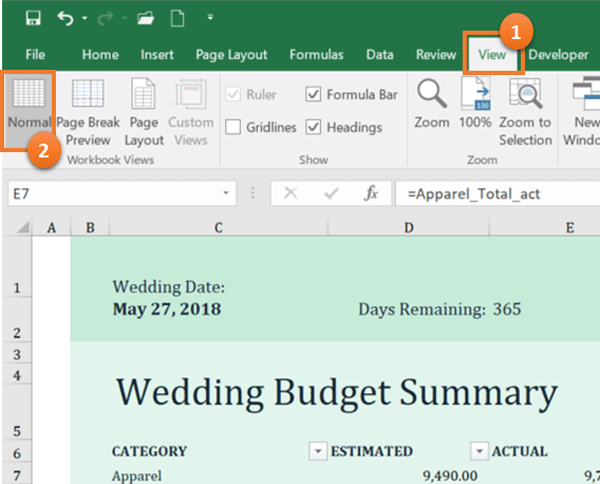
The Normal view in Excel is the most commonly used view and arguably the best view for adding data to a worksheet.
* Page Break Preview Excel 2016
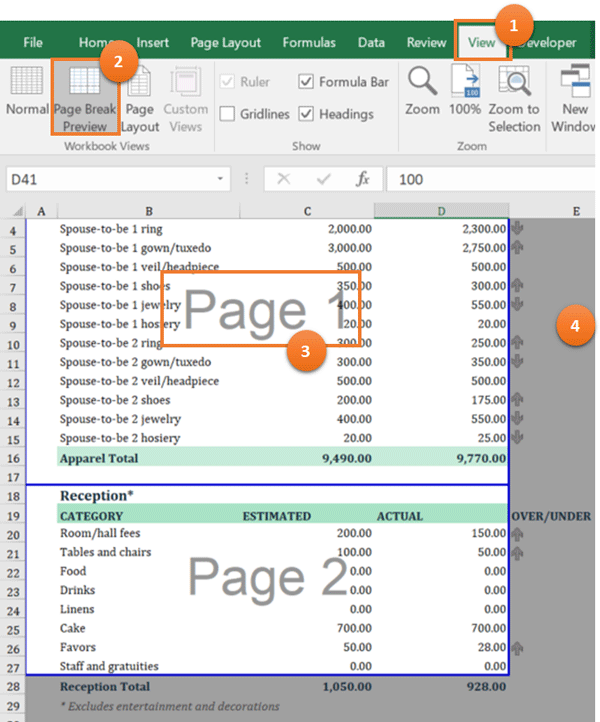
The Page Break Preview in Excel is a very powerful print preview that allows you to manually move page breaks and reorganize a worksheet into pages for printing. You can break off columns or rows in exactly the best spot by moving the blue lines of the Excel 2016 Page Break Preview.
To use the Excel Page Break Preview:
1. Click on the View tab on the Ribbon.
2. In the Workbook Views group, click on Page Break Preview.
3. The feint watermarks denoting Page 1 and Page 2, is an indication of how many pages the worksheet contains and will print to.
4. All the data (numbers, icons, text, etc.) in the dark grey area, will be excluded when you print the worksheet.
To resize pages and include or exclude rows or columns:
1. Click the vertical blue line and hold down the left mouse button to drag the line to the left or right to include or exclude columns. This line sets the width of the page. Excel will automatically resize the data on the page to fit the width you drag this line to, which can sometimes lead to printed data being too small to read.
2. Click the horizontal blue line and hold down the left mouse button to drag the line up or down to include or exclude rows. This line sets the height of the page. Excel will automatically resize the data on the page to fit the height you drag this line to, which can also sometimes lead to the data, when printed, being too small to read.
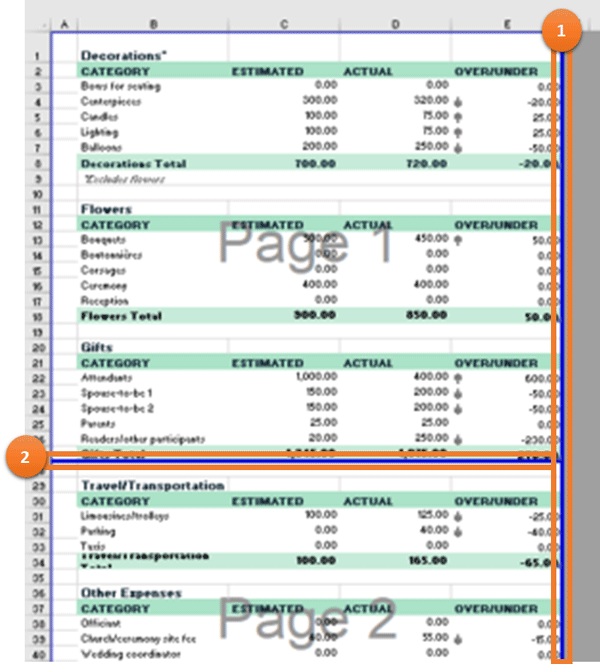
It is quick and easy to manipulate a worksheet in this view to ensure it prints over the exact number of pages required.
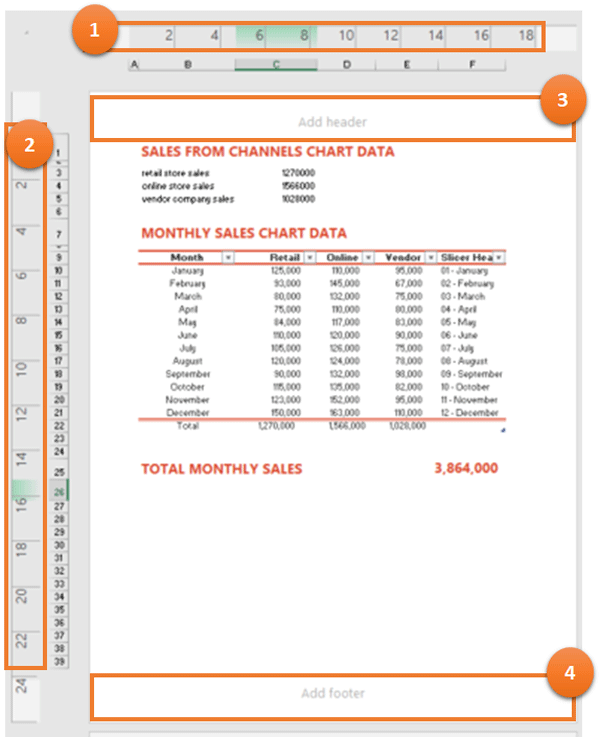
* Page Layout View Excel 2016
You use the Excel Page Layout View to add design elements to the headers and footers of a worksheet, such as company logos, page numbers, document names, dates and times. These elements are not usually visible in other view types, but will print with each page of the workbook.
To navigate to the MS Excel Page Layout View:
1. Click on the View tab on the Ribbon.
2. In the Workbook Views group, click on Page Layout View.
In the Page Layout View, an Excel worksheet can be created, managed, formatted and edited as if it is a page in a regular MS Word document.
Key features and actions that can be effected in this layout is:
1. Use the horizontal ruler to resize page margin width.
2. Use the vertical ruler for resizing page margin height.
3. Click in the Header area to add content.
4. Click in the Footer area to add content.
You can add automatic page numbers, date, time, where the file is saved, the file name, worksheet name, images such as a company logo, typed words and numbers and more, to the header or footer region of the worksheet.
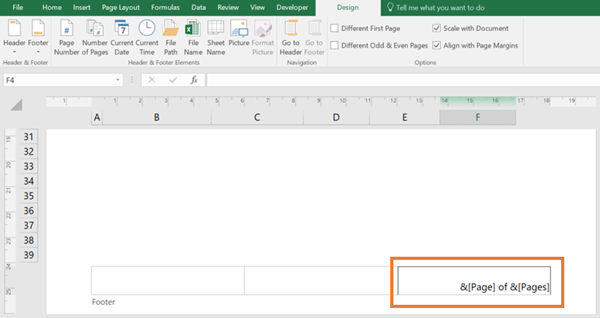
Add content to the Excel Header and Footer areas in three simple steps:
1. Click in the Header or Footer area.
2. Click on the Header & Footer Tools contextual tab (remember this only appears if you have clicked in a header or footer area).
3. Select content to add to the Header or Footer.
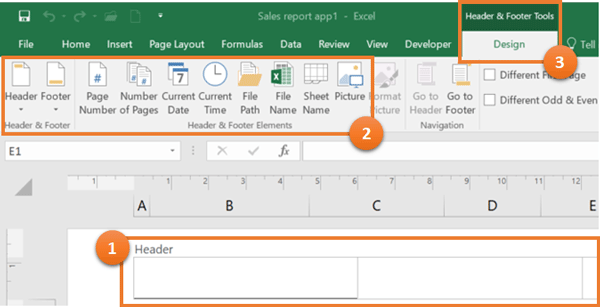
Don’t be alarmed when content you add to the header or footer displays strangely as in the area outlined in orange in the screenshot below. This is Microsoft Excel’s way of storing the content, and when you exit the Header and Footer region or print the worksheet, these strange characters will disappear.
The Page Layout view in Excel will help you to create professional and aesthetically pleasing worksheets for printing or sharing in PDF format, in no time at all!
* Custom Views Excel 2016
If none of the views listed above is exactly what you are looking for, Microsoft has added a further customizable view type, aptly named Custom Views. This option allows you to set the exact view and print settings you prefer and allows you to then apply this view to other worksheets on demand.
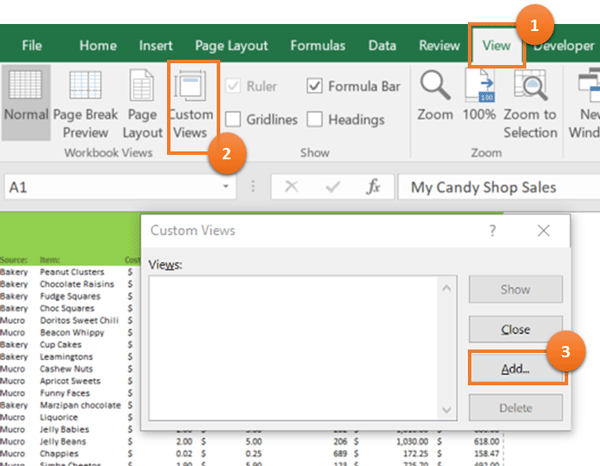
To trial the Custom View feature in Excel:
1. Open an existing worksheet.
2. Adjust the zoom to 50%. (A quick way to zoom in and out, is to hold down the control key on your keyboard whilst using the scrolling wheel on the mouse to zoom in and out).
3. Click on the View tab on the Ribbon and in the Show group, untick the Gridlines and Headings boxes.
To save the custom view created in the three steps above:
1. Click on the View tab on the Ribbon.
2. In the Workbook Views group, click on Custom Views.
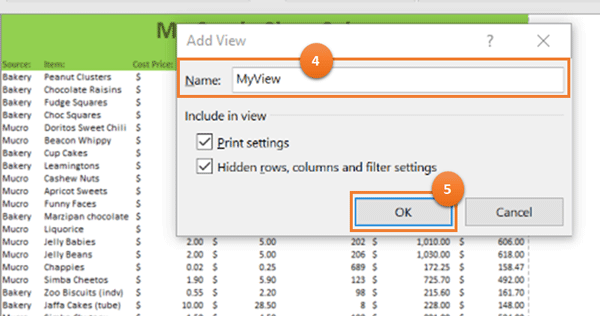
3. In the Custom Views dialog box, click on Add.
4. Give your custom view a name, for example, MyView.
5. Press OK to save the Custom View.
To apply the Custom View created in the steps above:
1. Change the zoom and re-display the gridlines and headings.
2. Click on the View tab on the Ribbon.
3. In the Workbook Views group, click on Custom Views.
4. In the Custom Views dialog box, select the name of the Custom View you created and press SHOW to apply it.
The benefit of this View is that you can zoom in and out of a worksheet or change other view settings to make it more convenient to use the worksheet whilst editing it or adding data. Once you are done, you can quickly return to your preferred view via the named Custom View you created.
Woohoo! Now that you have done the tutorial:
Test your Excel skills with the corresponding FREE Online Multiple Choice
Making Excel View Types Work for You – 2016 Excel Basics Test
* TRY THE NEXT TEST: Mastering the Ribbon & QAT (Quick Access Toolbar)
* TRY THE NEXT TUTORIAL: Mastering the Ribbon & QAT (Quick Access Toolbar)